Python: Network Automation with Telnetlib
Updated:
What is Network Automation?
Network automation is the process of automating the configuration, management and operations of a computer network. The tasks that are normally done by the network or system administrator can be automated using a number of tools and technologies such as Python and Ansible.
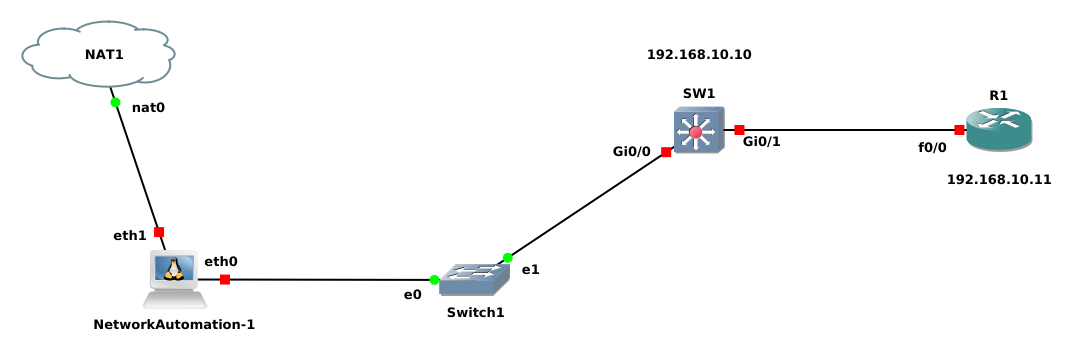
In this blog, we are going to set up Network Automation hands-on lab for Python in GNS3. Create the simple topology as the figure below:
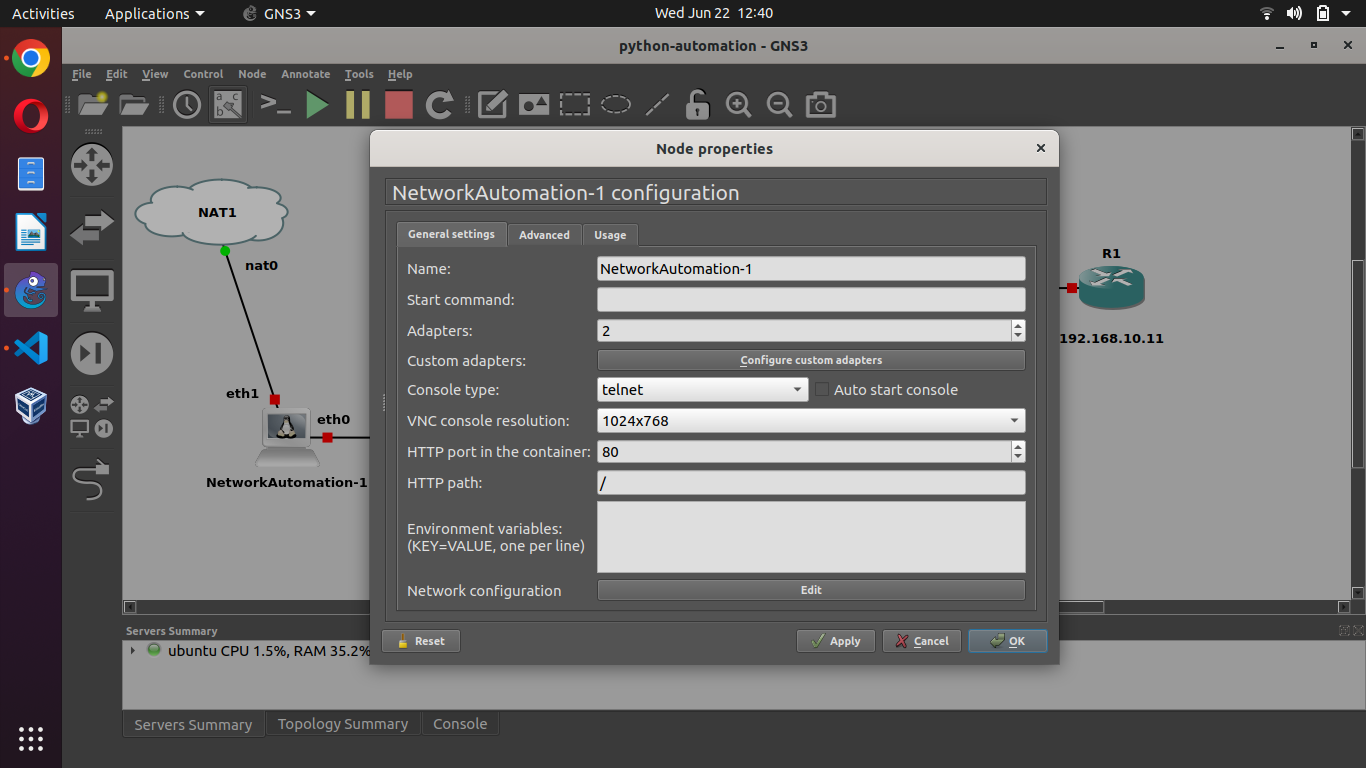
NetworkAutomation-1 Configuration
First, Aad two interface as below:
Open console connection of container and type command nano /etc/network/interfaces and configure as below:
# Static config for eth0
auto eth0
iface eth0 inet static
	address 192.168.10.2
	netmask 255.255.255.0
#	gateway 192.168.0.1
#	up echo nameserver 192.168.0.1 > /etc/resolv.conf

# DHCP config for eth0
#auto eth0
#iface eth0 inet dhcp

# Static config for eth1
#auto eth1
#iface eth1 inet static
#	address 192.168.1.2
#	netmask 255.255.255.0
#	gateway 192.168.1.1
#	up echo nameserver 192.168.1.1 > /etc/resolv.conf

# DHCP config for eth1
auto eth1
iface eth1 inet dhcp
Save with ctrl+o and exit with ctrl+x.
Then restart network automation, and check the IP address with ifconfig command. Now configure the router in the same subnet as the container network address.
Router Configuration
conf t
hostname R1
int fa0/0
ip address 192.168.10.11 255.255.255.0
no shut
end
We need to enable a password for the telnet connection to the router. We set transport input all so that all types of connections are permitted including telnet.
conf t
enable password cisco
username admin password cisco
line vty 0 4
login local
transport input all
end
wr
Switch Configuration
On switch S1, we see that only the default VLAN is configured with sh vlan and sh vlan brief commands, configure S1 as below:
conf t
hostname S1
enable password cisco
username admin password cisco
line vty 0 4
login local
transport input all
end
Check interface with command sh ip int brief
Configure the IP address on VLAN1
conf t
int vlan 1
ip address 192.168.10.10 255.255.255.0
no shut
end
wr
Telnet
Telnet is a type of network protocol that allows a user in one computer to login, to another computer.
The telnet command is used along with the hostname and then the user credentials are entered. Telnet sends commands and retrieves data from the remote devices in plain text, so it is recommended that not be used in the production environment.
Python telnetlib Module
The telnetlib is a Python module, that provides a Telnet class that implements the Telnet protocol. Python’s telnetlib lets you easily automate access to Telnet servers, even from non-Unix machines. The telnetlib library is already included in the python package. We don’t need to install it rather just import it into our program as given below:
import telnetlib
Now I’m going to show you how to use telnetlib with practical examples.
Copy the python script from Python website to your PC and amend it, as per your requirement.
Below is the python code for achieving our task, which shows the IP interface brief. Write the code using a nano editor as exe_01.py.
A simple example to show IP interface brief on S1.
import getpass
import telnetlib

# Declare a variable for storing the IP address
HOST = "192.168.10.10"
# Declare a variable for storing username
user = input("Enter your Username: ")
# Use getpass module, to get the password from the user
password = getpass.getpass()
# Pass the IP variable value in to the Telnet class
tn = telnetlib.Telnet(HOST)

tn.read_until(b"Username: ")  # read until found the Username:
# Convert user string in ascii encoding to be send to the switch as ascii characters
tn.write(user.encode('ascii') + b"\n")
if password:
    tn.read_until(b"Password: ")
    tn.write(password.encode('ascii') + b"\n")
tn.write(b"sh ip int bri\n")
tn.write(b"exit\n")
# read_all() function will show the output on your screen after decoding the ascii to unicode
print(tn.read_all().decode('ascii'))
Python code to configure R1.
import getpass
import telnetlib

HOST = "192.168.10.11"
user = input("Enter your telnet username: ")
password = getpass.getpass()

tn = telnetlib.Telnet(HOST)
tn.read_until(b"Username: ")
tn.write(user.encode('ascii') + b"\n")

if password:
    tn.read_until(b"Password: ")
    tn.write(password.encode('ascii') + b"\n")

tn.write(b"enable\n")
tn.write(b"cisco\n")
tn.write(b"conf t\n")
tn.write(b"int loop 0\n")
tn.write(b"ip address 1.1.1.1 255.255.255.255\n")
tn.write(b"end\n")
tn.write(b"exit\n")
print(tn.read_all().decode('ascii'))
SSH configuration
Python code to configure ssh using for loop on S1 and R1.
import telnetlib
import getpass

user = input("Welcome, if authorized... \nPlease enter your telnet Username: ")
password = getpass.getpass()

# for loop
for IP in range (10,12):
    HOST = "192.168.10." + str(IP)
    print ('configuration of 192.168.10.' + str(IP))

    tn = telnetlib.Telnet(HOST)
    tn.read_until(b"Username: ")
    tn.write(user.encode('ascii') + b"\n")
    if password:
        tn.read_until(b"Password: ")
        tn.write(password.encode('ascii') + b"\n")

    tn.write(b"enable\n")
    tn.write(b"cisco\n")
    tn.write(b"conf t\n")
    tn.write(b"ip domain-name cisco.com\n")
    tn.write(b"crypto key generate rsa modulus 1024\n\n")
    tn.write(b"end\n")
    tn.write(b"write memory\n")
    tn.write(b"exit\n")
    print(tn.read_all().decode("ascii"))
print() # add blank line
print("Done")
print()
More script at GitHub
Comments