Part 03: Ansible Automation Lab Setup with GNS3
Updated:
Introduction
GNS3 is used by hundreds of thousands of network engineers worldwide to emulate, configure, test and troubleshoot virtual and real networks. GNS3 allows you to run a small topology consisting of only a few devices on your laptop, to those that have many devices hosted on multiple servers or even hosted in the cloud.
GNS3 is open source, free software that you can download from http://gns3.com
Quick Start Requirements
Install GNS3 if you don’t have it and VMware or virtual box.
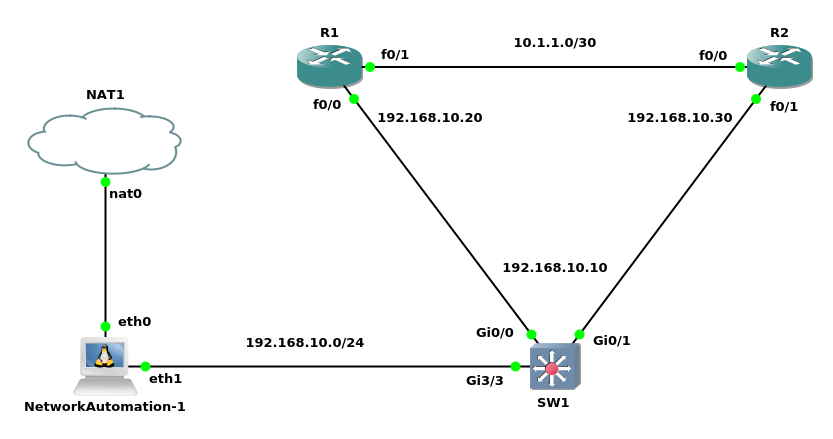
Lab Topology

Ansible Lab Configuration
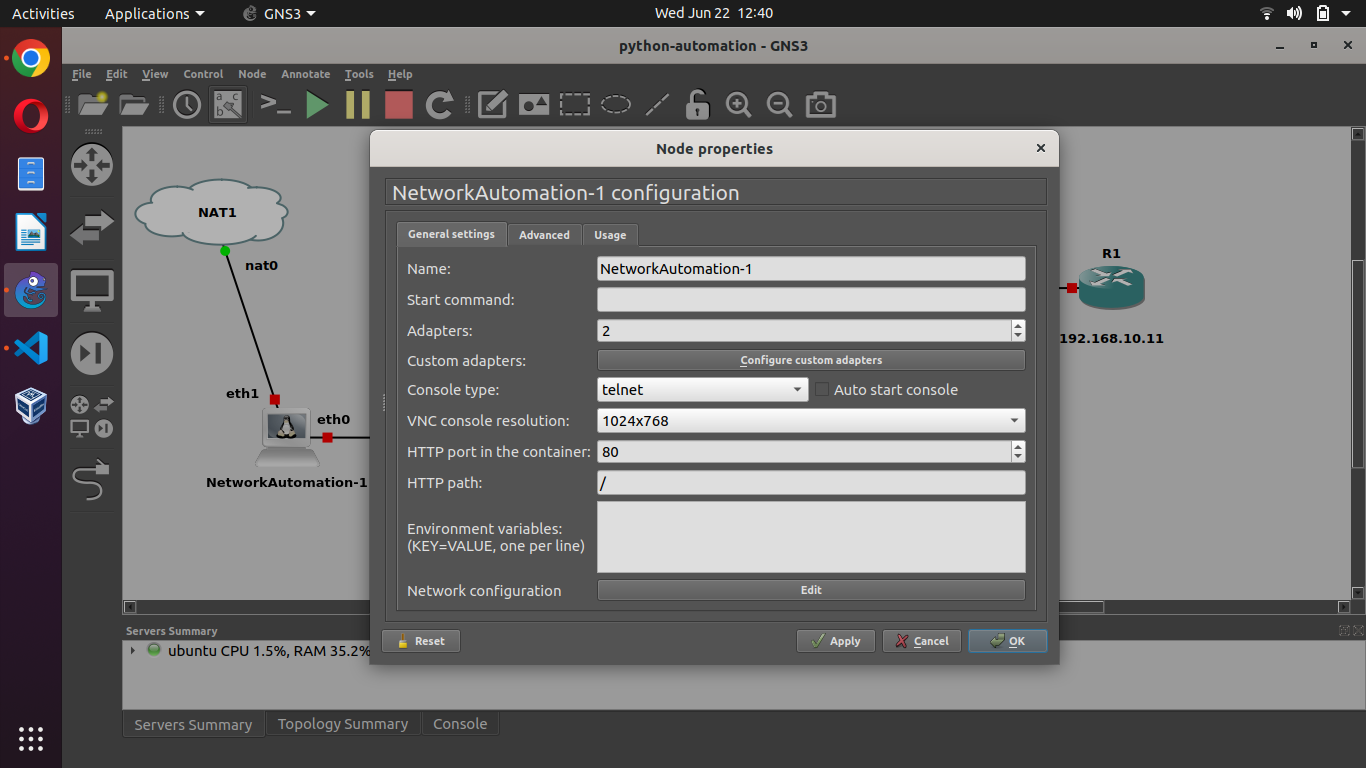
In above lab there is an Network-automation node with 02 network interface cards on our network with Ansible already installed. I have to point out that I have removed Ansible in the automation machine and installed Ansible 2.9.9 with pip3, sshpass and changed IP Address configurations as shown below:

# Static config for eth0
#auto eth0
#iface eth0 inet static
#       address 192.168.0.2
#       netmask 255.255.255.0
#       gateway 192.168.0.1
#       up echo nameserver 192.168.0.1 > /etc/resolv.conf

# DHCP config for eth0
auto eth0
iface eth0 inet dhcp

# Static config for eth1
auto eth1
iface eth1 inet static
        address 192.168.10.2
        netmask 255.255.255.0
#       gateway 192.168.10.1
#       up echo nameserver 192.168.10.1 > /etc/resolv.conf

# DHCP config for eth1
#auto eth1
#iface eth1 inet dhcp
Device’s Configuration
Enabling ssh and connect to a network device manually and retrieve its configuration required for Ansible to configure devices remotely. This manual connection also establishes the authenticity of the network device, adding its RSA key fingerprint to your list of known hosts. (If you have connected to the device before, you have already established its authenticity.)
SW1 Configuration
enable
!
conf terminal
!
hostname SW-1
!
ip domain-name tech.com
!
crypto key generate rsa modulus 1024
!
username admin password cisco
!
username admin pri 15
!
line vty 0 4
 transport input ssh
 login local
!
interface vlan 1
 no shutdown
 ip address 192.168.10.10 255.255.255.0
!
exit
!
end
!
wr
R1 Configuration
enable
!
conf terminal
!
hostname R-1
!
ip domain-name tech.com
!
crypto key generate rsa general-keys modulus 1024
!
username admin password cisco
!
username admin pri 15
!
line vty 0 4
 transport input ssh
 login local
!
interface fastEthernet 0/0
 ip add 192.168.10.20 255.255.255.0
 no sh
!
exit
!
end
!
wr
R2 Configuration
enable
!
conf terminal
!
hostname R-2
!
ip domain-name tech.com
!
crypto key generate rsa general-keys modulus 1024
!
username admin password cisco
!
username admin pri 15
!
line vty 0 4
 transport input ssh
 login local
!
interface fastEthernet 0/1
 ip add 192.168.10.30 255.255.255.0
 no sh
!
exit
!
end
!
wr
Introduction to ad-hoc commands
An Ansible ad hoc command uses the /usr/bin/ansible command-line tool to automate a single task on one or more managed nodes. ad hoc commands are quick and easy, but they are not reusable.
Run Your First Network Ansible Ad-hoc Command
Instead of manually connecting and running a command on the network device, you can retrieve its configuration with a single, stripped-down Ansible command as below:
root@NetworkAutomation-1:~# ansible all -i 192.168.10.10, -c network_cli -u admin -k -m ping -e ansible_network_os=ios
SSH password:
192.168.10.10 | SUCCESS => {
    "ansible_facts": {
        "discovered_interpreter_python": "/usr/bin/python3"
    },
    "changed": false,
    "ping": "pong"
}
The flags in this command set seven values:
-
the host group(s) to which the command should apply (in this case, all)
-
the inventory (-i, the device or devices to target - without the trailing comma -i points to an inventory file)
-
the connection method (-c, the method for connecting and executing ansible)
-
the user (-u, the username for the SSH connection)
-
the SSH connection method (-k, please prompt for the password)
-
the module (-m, the ansible module to run)
-
an extra variable ( -e, in this case, setting the network OS value)
Raw module in Ansible
The raw module is the module that doesn’t translate our commands and Ansible purley transfer our commands on remote devices via ssh. The raw module is mainly used for monitoring and troubleshooting and not for configuration.
Ansible raw module syntax
root@NetworkAutomation-1:~# ansible all -i 192.168.10.10, -u admin -m raw -a "sh ver" -k
SSH password:
192.168.10.10 | CHANGED | rc=0 >>
Cisco IOS Software, vios_l2 Software (vios_l2-ADVENTERPRISEK9-M), Version 15.2(4.0.55)E, TEST ENGINEERING ESTG_WEEKLY BUILD, synced to  END_OF_FLO_ISP
Technical Support: http://www.cisco.com/techsupport
Copyright (c) 1986-2015 by Cisco Systems, Inc.
Compiled Tue 28-Jul-15 18:52 by sasyamal


ROM: Bootstrap program is IOSv

SW-1 uptime is 34 minutes
System returned to ROM by reload
System image file is "flash0:/vios_l2-adventerprisek9-m"
Last reload reason: Unknown reason


This product contains cryptographic features and is subject to United
States and local country laws governing import, export, transfer and
use. Delivery of Cisco cryptographic products does not imply
third-party authority to import, export, distribute or use encryption.
Importers, exporters, distributors and users are responsible for
compliance with U.S. and local country laws. By using this product you
agree to comply with applicable laws and regulations. If you are unable
to comply with U.S. and local laws, return this product immediately.

A summary of U.S. laws governing Cisco cryptographic products may be found at:
http://www.cisco.com/wwl/export/crypto/tool/stqrg.html

If you require further assistance please contact us by sending email to
export@cisco.com.

Cisco IOSv () processor (revision 1.0) with 574709K/209920K bytes of memory.
Processor board ID 9UYFV9UROKE
1 Virtual Ethernet interface
16 Gigabit Ethernet interfaces
DRAM configuration is 72 bits wide with parity disabled.
256K bytes of non-volatile configuration memory.
2097152K bytes of ATA System CompactFlash 0 (Read/Write)
0K bytes of ATA CompactFlash 1 (Read/Write)
0K bytes of ATA CompactFlash 2 (Read/Write)
0K bytes of ATA CompactFlash 3 (Read/Write)

Configuration register is 0x0

**************************************************************************
* IOSv is strictly limited to use for evaluation, demonstration and IOS  *
* education. IOSv is provided as-is and is not supported by Cisco's      *
* Technical Advisory Center. Any use or disclosure, in whole or in part, *
* of the IOSv Software or Documentation to any third party for any       *
* purposes is expressly prohibited except as otherwise authorized by     *
* Cisco in writing.                                                      *
**************************************************************************Shared connection to 192.168.10.10 closed.
We probably don’t want to see every line of the output from “show version” command. So we can use grep, to filter, the name of the device and also the version.
root@NetworkAutomation-1:~# ansible all -i 192.168.10.10, -u admin -m raw -a "sh ver" -k | grep "CHANGED\|Version"
SSH password:
192.168.10.10 | CHANGED | rc=0 >>
Cisco IOS Software, vios_l2 Software (vios_l2-ADVENTERPRISEK9-M), Version 15.2(4.0.55)E, TEST ENGINEERING ESTG_WEEKLY BUILD, synced to  END_OF_FLO_ISP
One more example:
root@NetworkAutomation-1:~# ansible all -i 192.168.10.20,192.168.10.30, -u admin -m raw -a "sh ip int bri | ex unass" -k
SSH password:
192.168.10.20 | CHANGED | rc=0 >>

Interface                  IP-Address      OK? Method Status                Protocol
FastEthernet0/0            192.168.10.20   YES NVRAM  up                    up
FastEthernet0/1            10.1.1.1        YES NVRAM  up                    up      Shared connection to 192.168.10.20 closed.

192.168.10.30 | CHANGED | rc=0 >>

Interface                  IP-Address      OK? Method Status                Protocol
FastEthernet0/0            10.1.1.2        YES NVRAM  up                    up
FastEthernet0/1            192.168.10.30   YES NVRAM  up                    up      Shared connection to 192.168.10.30 closed.
More practical examples are below:
ansible all -m raw -u admin -a “show running-config | include username” -k
ansible all -m raw -u admin -a “show ip interface brief” -k
ansible all -m raw -u admin -a “show ip interface brief | exclude unass” -k
ansible all -m raw -u admin -a “show arp” -k
ansible all -m raw -u admin -a “show mac address-table | include ” -k
Comments